Step 1: Add New Event
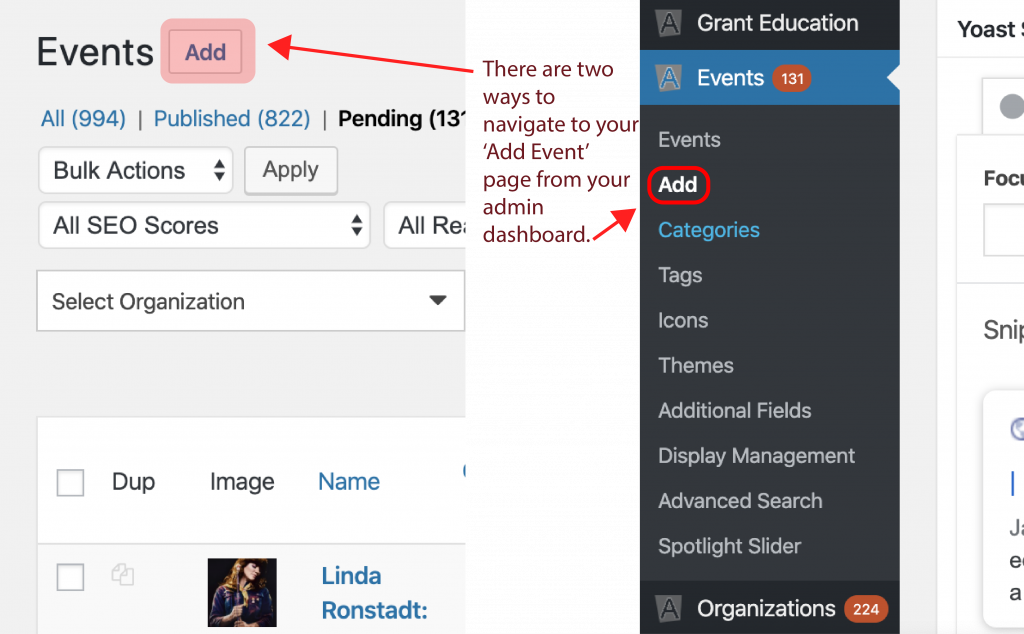
Click Events in your lefthand sidebar, and then click the ‘Add’ button at the top of the page to open up a new Event Submission form.
Or
Hover over the Events link in the left sidebar and click on the Add link to open up a new Event Submission form.
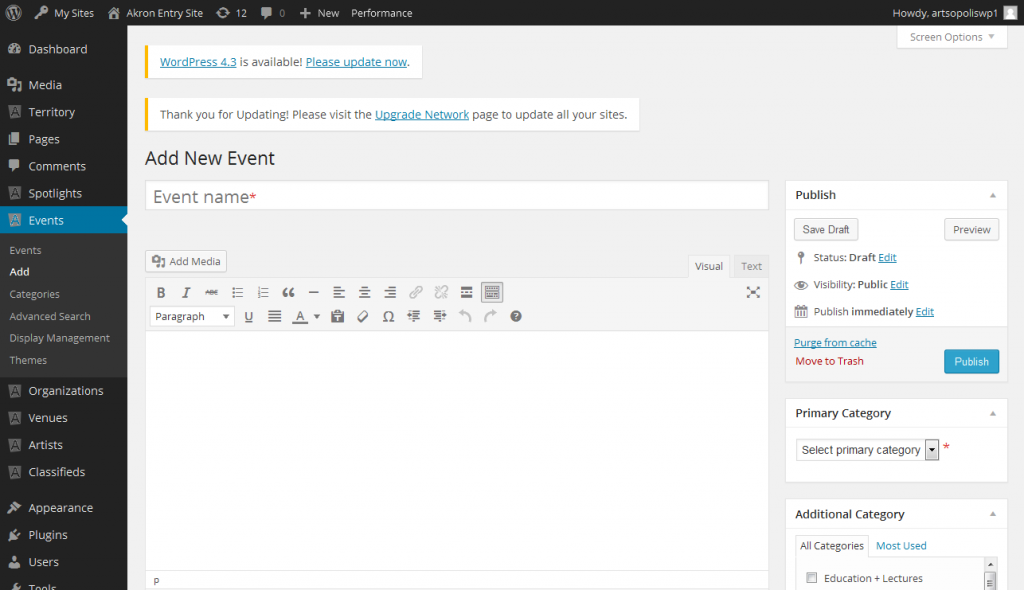
Step 2: Fill Out Form
Fill out the form with the title, event description, summary (optional), and event url. The summary is a brief statement or marketing content that appears above the ‘Buy Tickets’ and ‘Add It’ buttons on the event detail page. The description should contain the full details of the event.
NEW FEATURE! Virtual Event Indicator
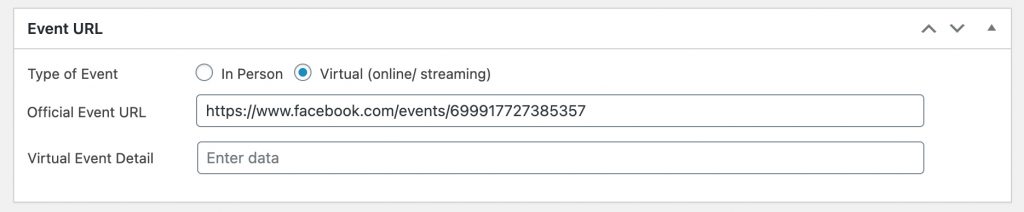
The event URL includes a new virtual event feature. Users can now indicate whether the event is ‘in-person’ or an ‘online/streaming’ virtual event. The front end event submission form will include the two radio buttons as well as the event url field – see below.

The back end event submission form includes the addition of the ‘virtual event detail’ field which supports additional text below the black button. For now, this field is only on the back end form in order for Content Managers to control the content and keep it concise. Information in this field should include the host, day of the week, date and time (i.e., Facebook Live – Wednesday, January 27, 2021 at 7:00 PM).
Here is how this new feature displays on the front end. Please note that the label “Virtual Event” is customizable, so if you prefer that it have a different label just let us know and we’ll change it in the theme’s template. Some folks prefer “Online Event” or “Online/Streaming Event”, etc.
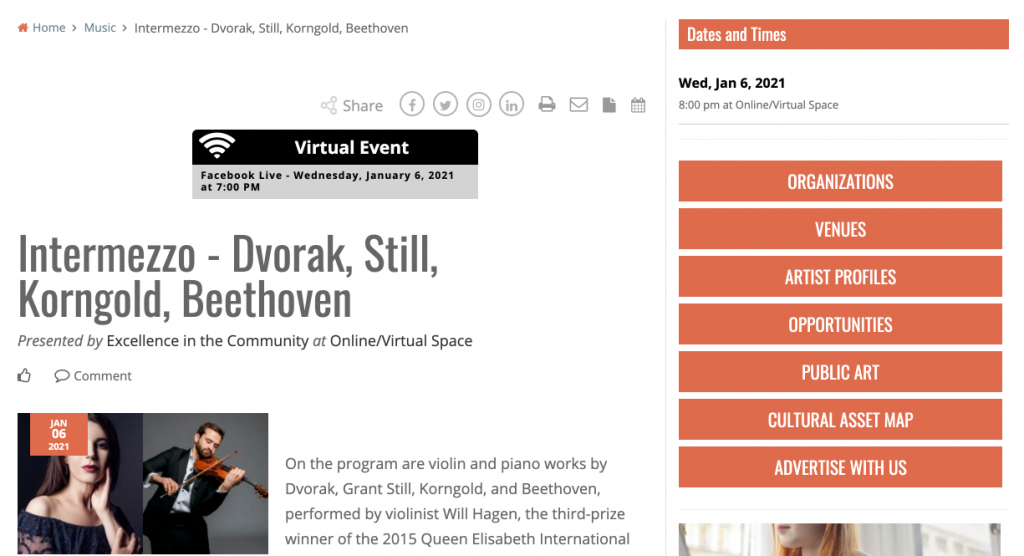
Lastly, if you opt to NOT add any content to the ‘virtual event detail’ field, the gray background will not display but the black bar with the label ‘Virtual Event’ will still display.
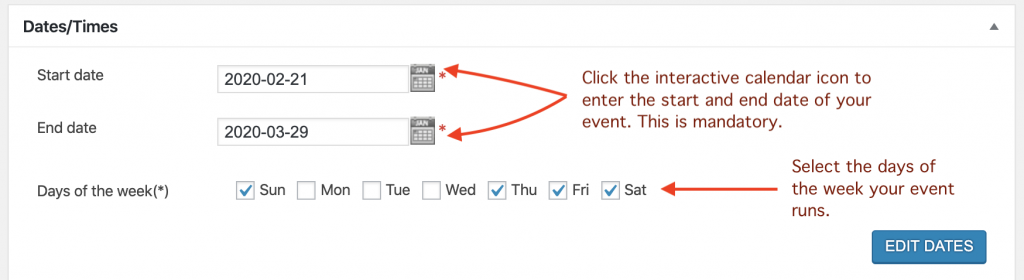
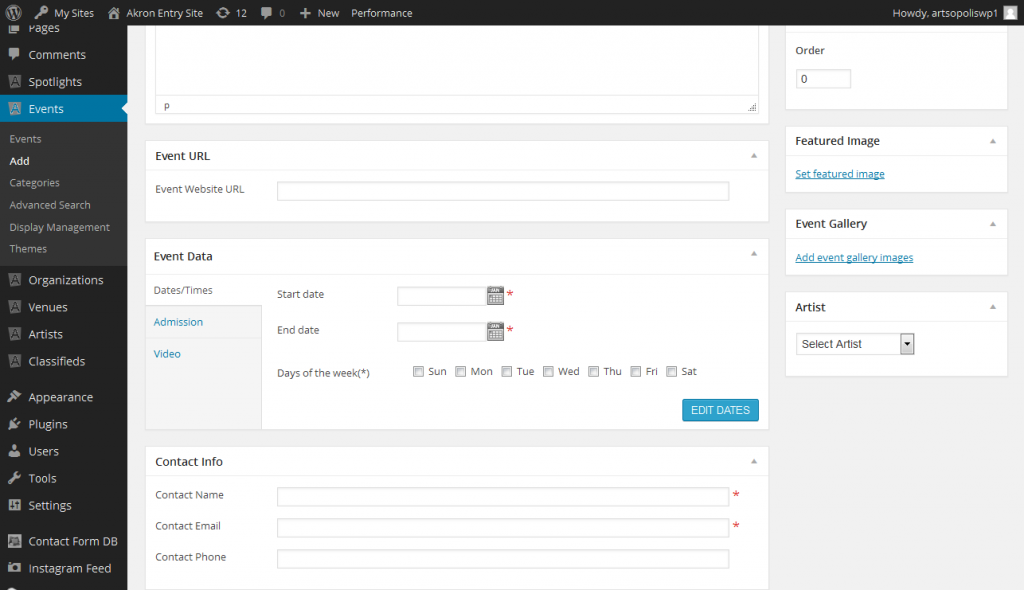
Dates/Times
Event Data includes date & time info, admission and video links.
To enter dates, click on the Start Date field and an interactive calendar will display. Click on the start date and it will auto-populate the field. Do the same thing for the End Date. Then check off the Days of the Week the event takes place on. You will have a chance to fill in the times after to save the form.
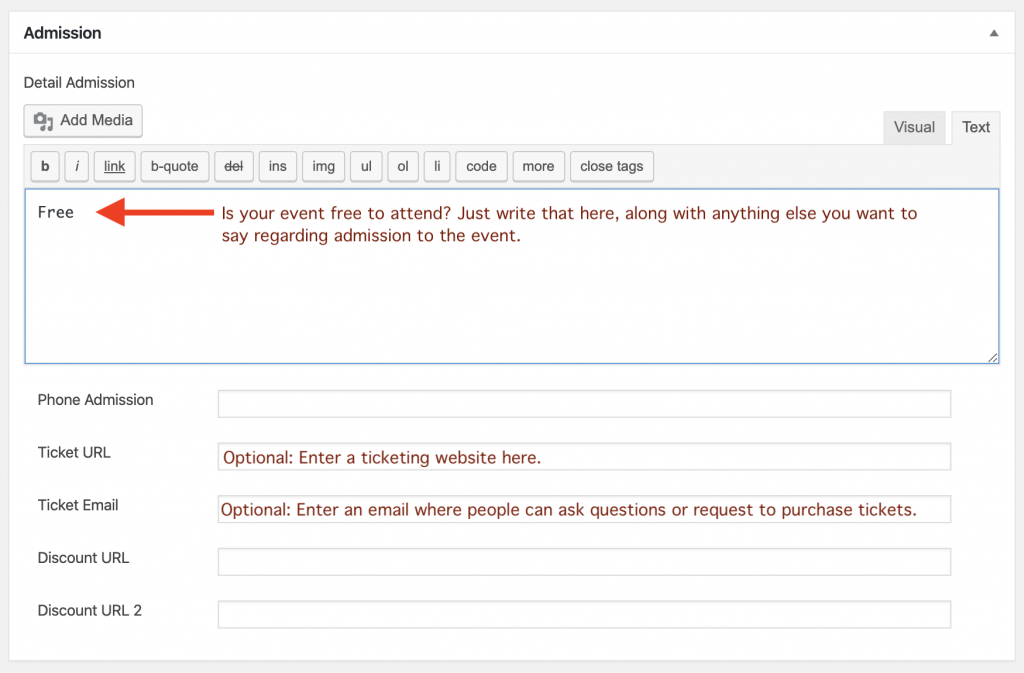
Admission Details
Enter Admission information. Add a ticket website in the URL field, or if the event is free to attend, just type ‘Free’ in the box provided.
Fill in the required contact fields and check off any accessibility information regarding your event or venue that may apply.
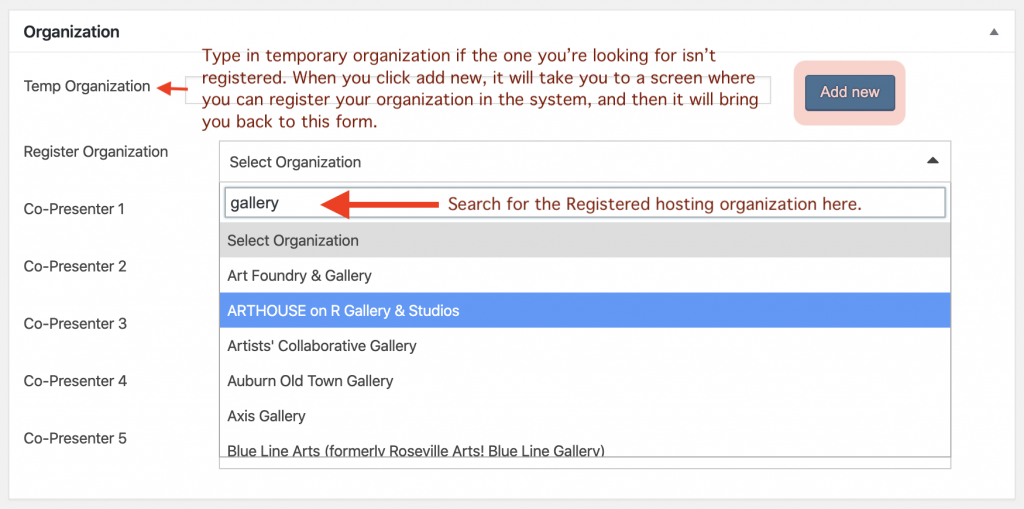
Select the registered Organization from the drop menu or enter a temporary org name.
Select the registered Venue from the drop menu or enter a temporary venue name and address information.
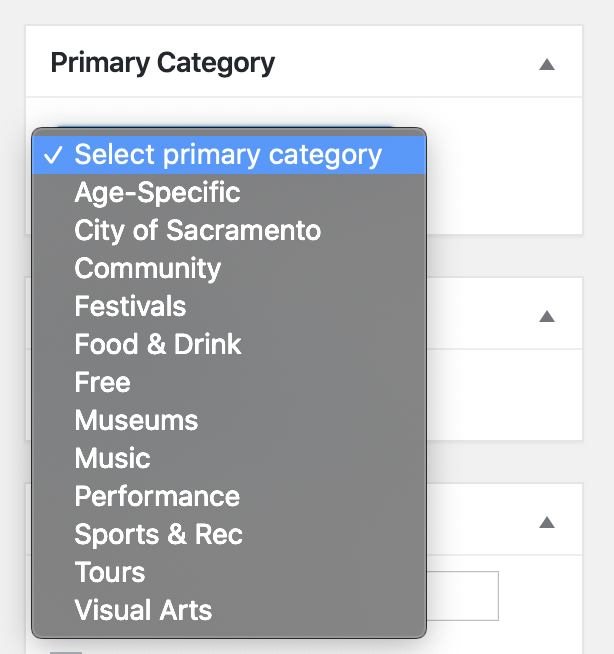
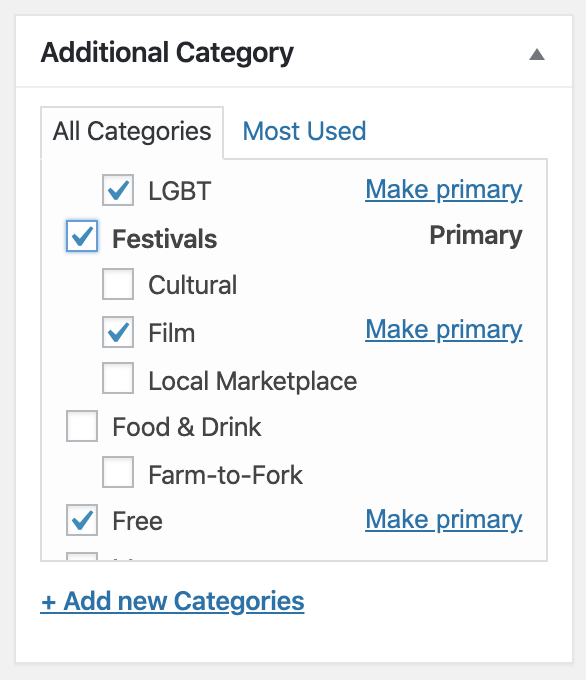
Scroll up to the top of the form, and select the Primary Category from drop menu in the right sidebar. You may also select additional categories and subcategories, as well from the Additional Category block.
Step 3: Upload Featured Image
Scroll down a little further and click on the Set Featured Image link to upload a primary event image. This will open up the Media Library.
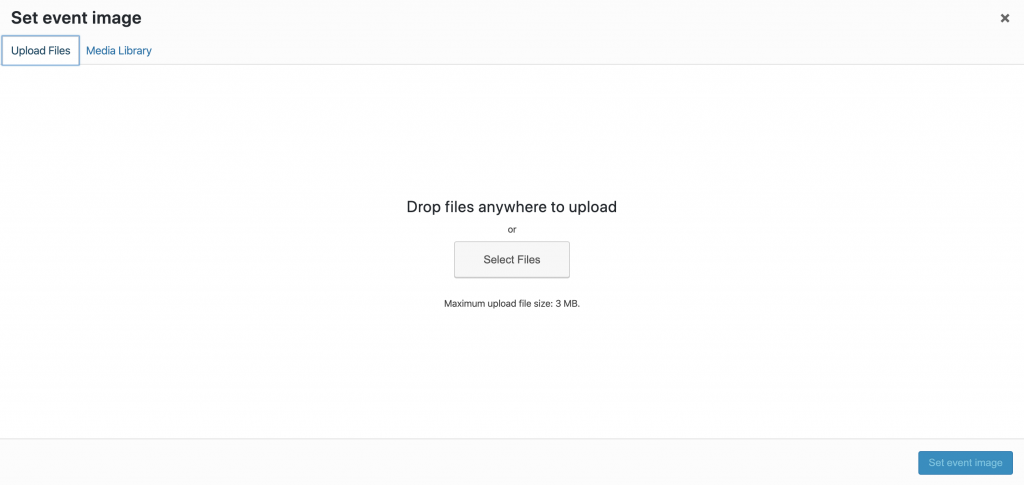
To upload an image, simply drag the image from you desktop and drop it directly into the Media Library. You can also select the Upload Files tab and drop files or select them from your desktop or image location. Event images must be at least 400×400 pixels in both directions.
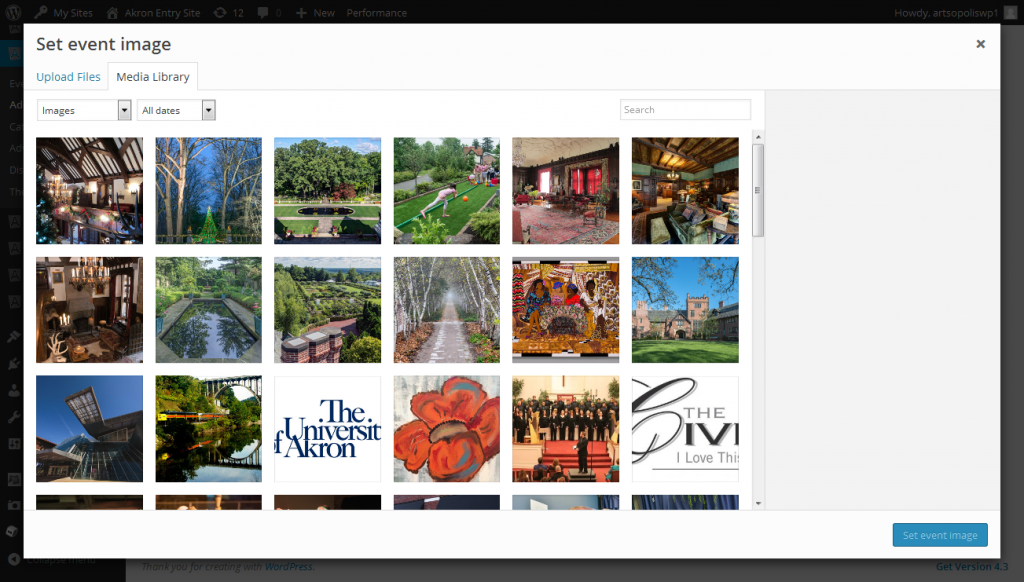
Once the image is fully uploaded, click on the Set Event Image button. You will then be directed back to the event form and the primary image will display under the Featured Event block in the right sidebar.
Scroll back up to the top of the form and click on the Publish button to save your Event Submission Form. This publishes/displays the event on your calendar site. If you do not want to publish the event yet, click the Draft link instead. The event will remain in draft mode until you “Publish” it.
Step 4: Add Start/End Times
You can now add the times to your form. Simply set the start time and end time (optional) and then click on the Apply To All link. This will apply the start times to all your dates. If you need to edit a time, just click on the start time on the specific date. Change the time and click the Edit Time button. Scroll back up to the top of the form and click on the Update button to save your Event Submission Form.
Please note: once you have applied times to your dates, the Start Time field will reset to its default display of 1pm.
Questions or suggestions? Contact: networksupport@artsopolis.com