Artsopolis Calendar provides a searchable calendar of events for Artsopolis Network member content syndication partners. However, you can also use the Artsopolis Calendar on your own network site in lieu of Theme pages when theme pages don’t meet your needs.
Instructions
If the Artsopolis Calendar is going to be installed on a partner’s site, they will need to download and activate the plugin (https://wordpress.org/plugins/artsopolis-calendar/). You’ll also need to provide them with the two URLs (event and category) that display under the WordPress Generation header – see below.
If you plan to use the Artsopolis Calendar on your own site, the plugin has already been downloaded. To activate, go to Plugins > Installed Plugins and click on the activate link.
STEP 1 – For Network Admins
Setup your feed using the Syndication module. For instructions setting up a feed, go here – https://support.artsopolis.com/knowledge-base/create-a-feed-using-the-syndication-tool/. Once setup and published, you will need the Event URL as well as the Category URL for the set up of the calendar plugin.

STEP 2 – For Network Admins & Syndication Partner Sites
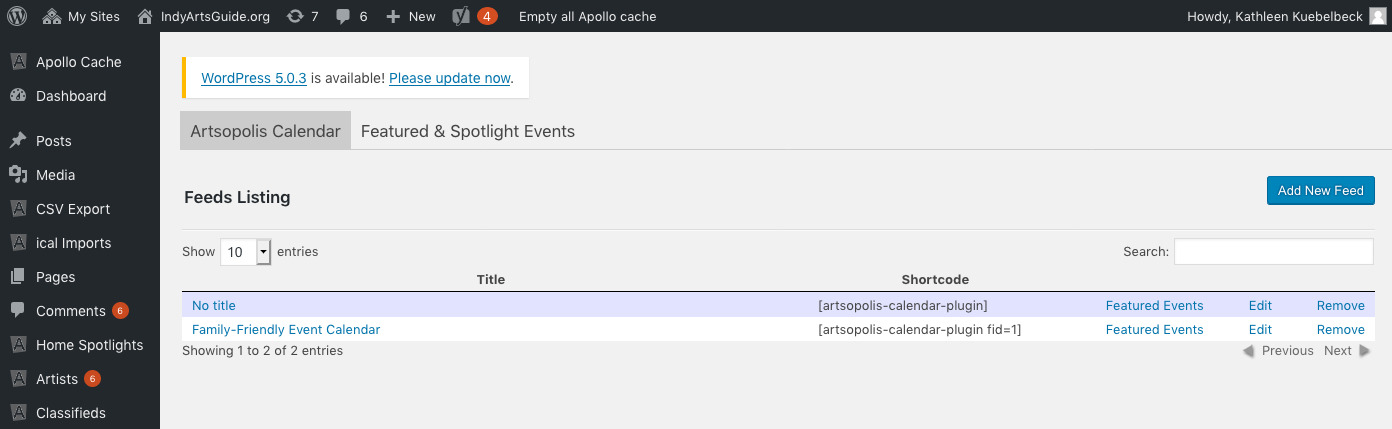
Go to Plugins > Artsopolis Calendar from the left column. Click the Add New Feed button.
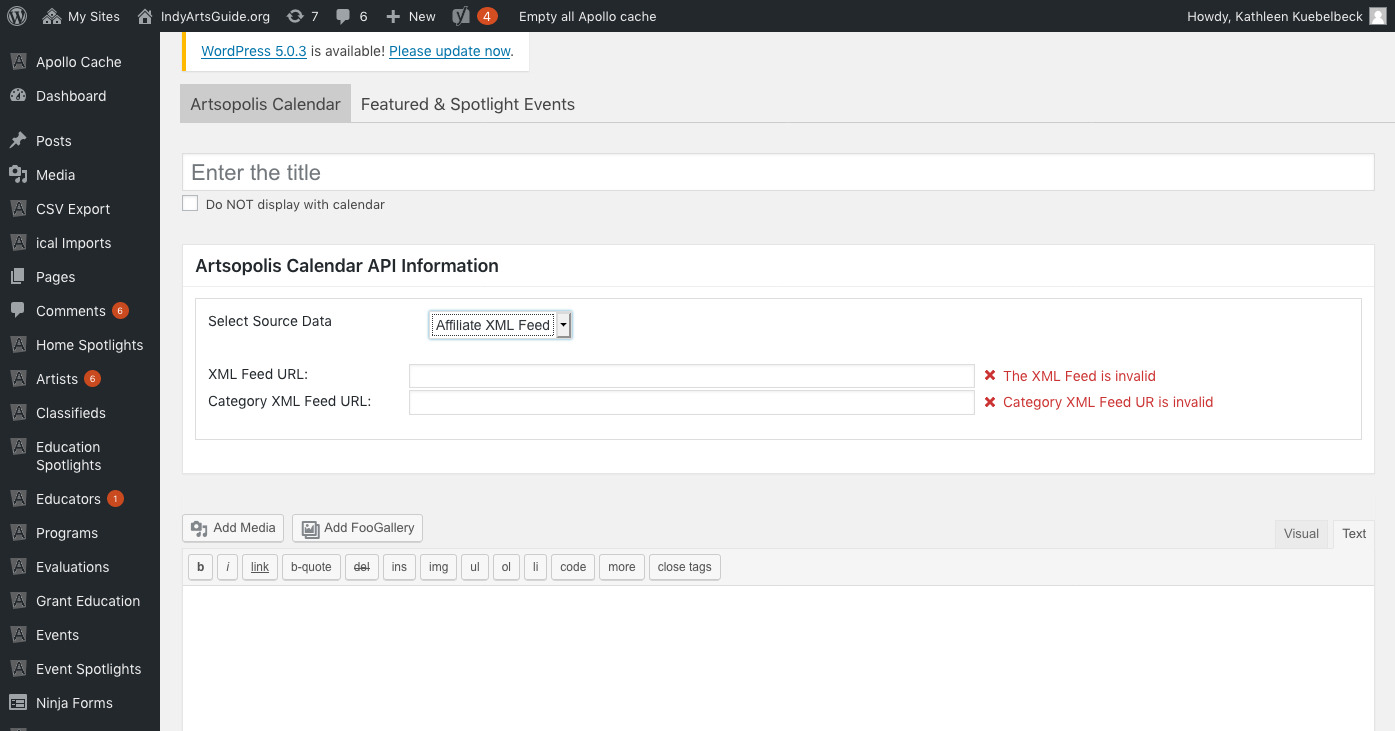
Enter the title of your calendar. This title will display on your calendar page but you have the option to suppress the title by selecting the Do NOT display checkbox.
Artsopolis Calendar API Information
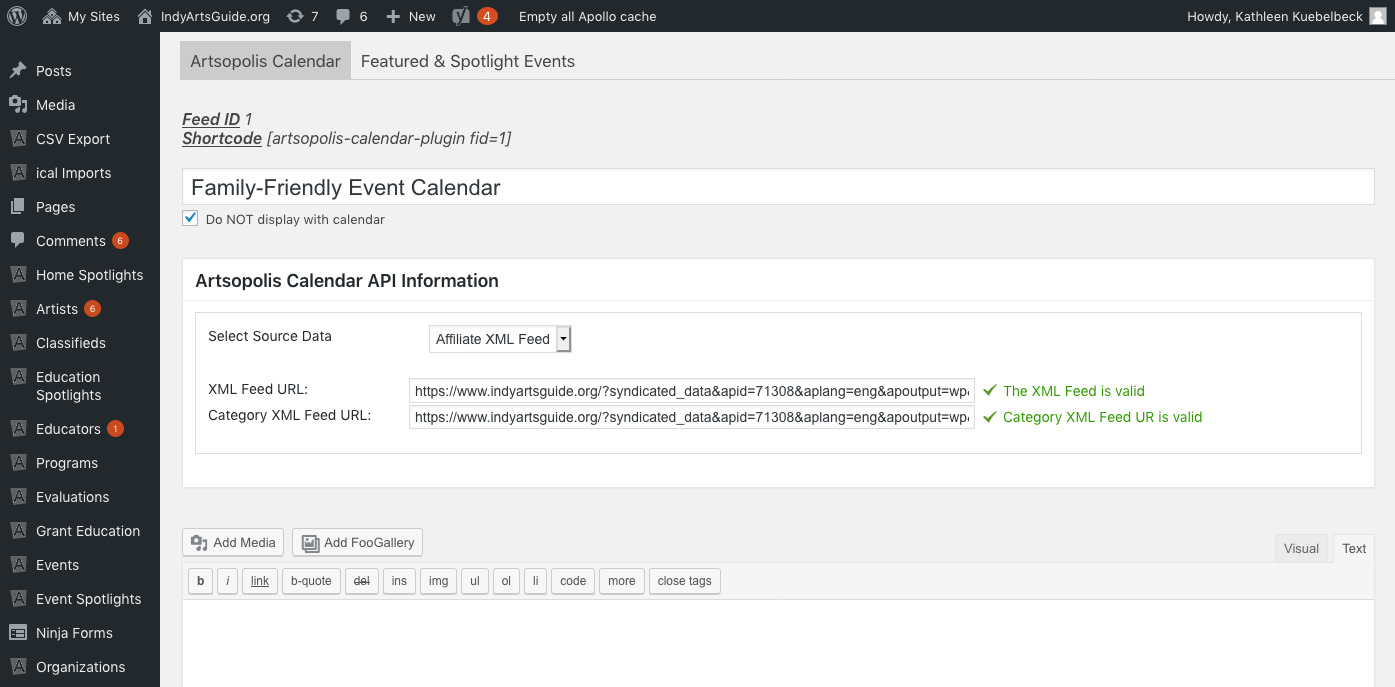
Next, select the source date from the drop menu. In almost all cases, it will be Affiliate XML Feed.
Then enter the event XML feed URL and category XML feed URL. Leave the Title and Body Text areas blank on this page.
Filled-in Form (example):
URL Settings
Next, in the Artsopolis Calendar’s slug field enter the page slug where you will be displaying the calendar. For example: “calendar” or “events”. This is the name of the page you will create and add the Artsopolis Calendar shortcode to the description field.

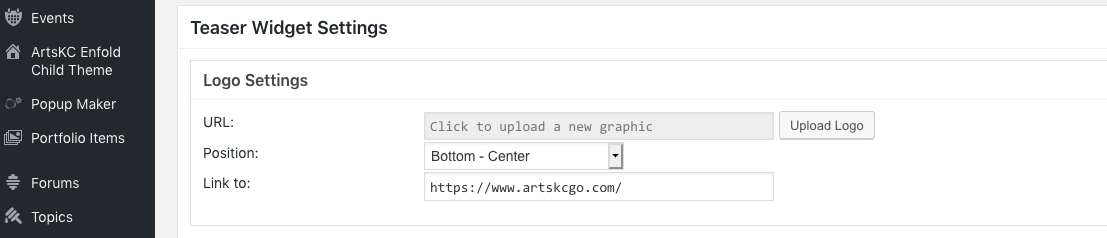
Teaser Widget Settings
Optional: If you are placing the Teaser Widget on your homepage in addition to the calendar, can upload a ‘powered by’ or other type of sponsor logo along with a link. You can also position where the logo displays on the ‘teaser’ widget.
For more instructions on the Teaser Widget, go to the bottom of this page.
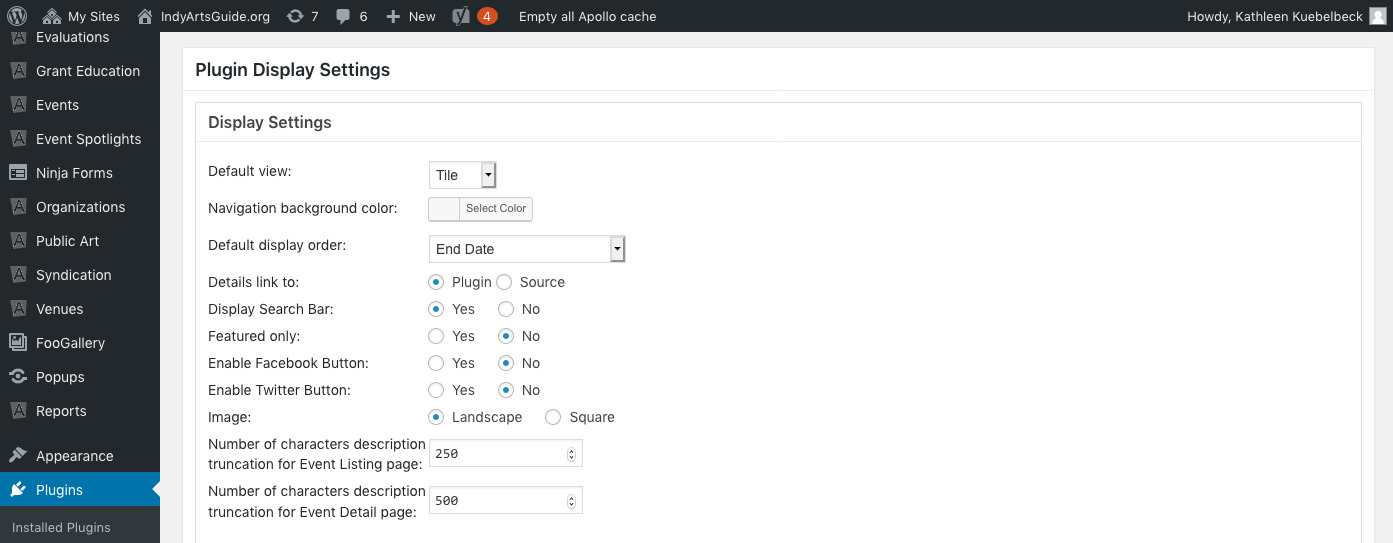
Plugin Display Settings
Under Display Settings you can select the default view (tile, list or by month), sort order for the event listings and a search bar background color as well as a few more display options.
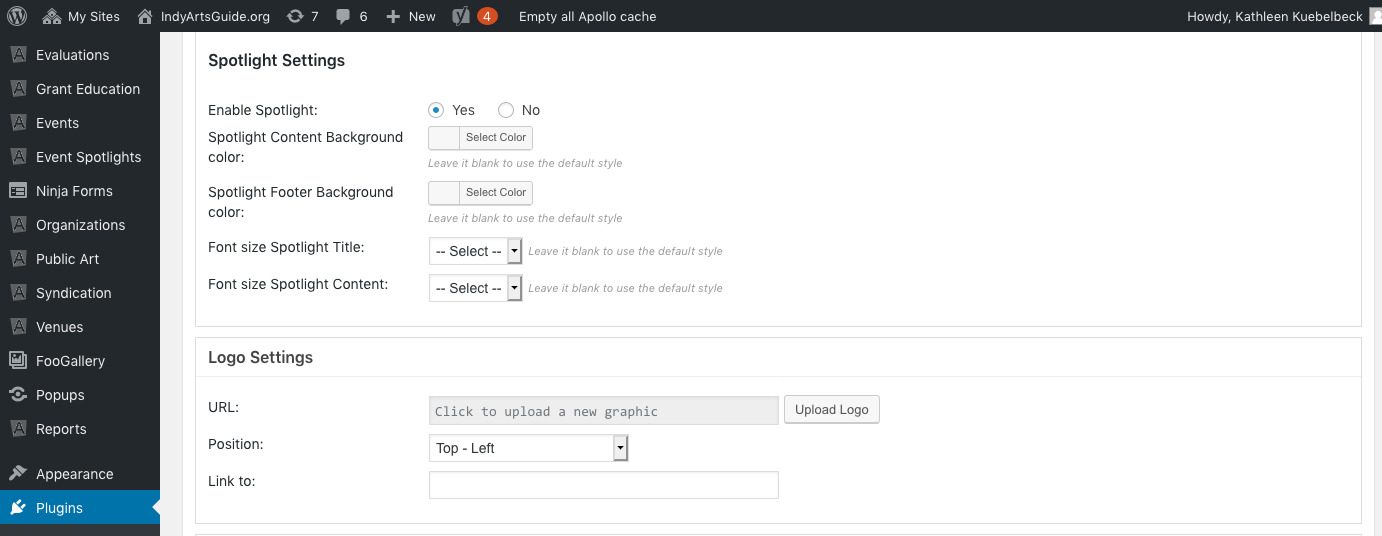
Spotlight Settings
If you or your syndication partner plan to manually set spotlighted events, click Yes to enable spotlighting. You also have options to add spotlight and content background colors, and select font size for the title and content.
Logo Settings
In Logo Settings, you can upload a ‘powered by’ or other type of sponsor logo along with a link. You can position where the logo displays on the main calendar page.
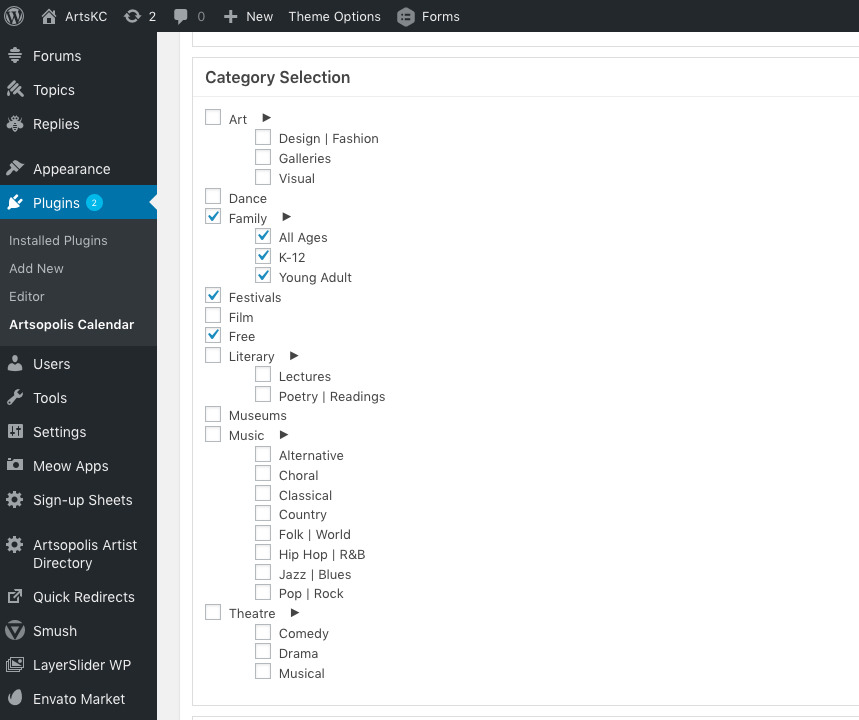
Category Selection
Under Category Selection, be sure to select all the categories you’d like to display on your calendar.
Next, click Save Changes button. Once your changes have been saved, add the following shortcode snippet to the calendar page you created: (artsopolis-calendar-plugin fid=#). Replace “#” with the appropriate ID number from the plugin you created and make sure to include the brackets.
Example: ![]()
This plugin allows you to add more than one calendar to your website. If you would like to add more than one calendar you will need to set up a separate page and add the same code snippet: (artsopolis-calendar-plugin fid=#). Replace “#” with the appropriate ID number for any subsequent calendars you create. For example, your first calendar may be (artsopolis-calendar-plugin fid=0); and then your second calendar may be (artsopolis-calendar-plugin fid=1). Each one can use a different selection of filters (i.e. one for just Music events and another for just Family-Friendly events).
Other system requirements: *Write permission of goldstar/xml directory is required. *cURL extension is required. *simplexml extension is required. *json extension is required. *openssl extension is required.
Teaser Widget
Optional: You can also add a “teaser” widget to promote 1-15 featured events on the right column of your website. To add the featured event teaser widget, on the main calendar plugin admin configuration form enter the slug of the page you are adding the main Artsopolis plugin to. IMPORTANT: If the slug you enter for the widget does not match the slug of the page you have added the main Artsopolis plugin to the widget will NOT display. For more information about slugs, you may wish to visit this page: https://codex.wordpress.org/Glossary#Slug
- From the main Artsopolis plugin Settings admin form select the “Featured Events” tab to select the specific events you would like to feature in the widget. This tab is located at the top of form next to the “Configuration” tab just above the “Add New Post” field.
- Next, select Appearance > Widget from the left column and then drag the “Artsopolis Calendar Teaser” widget to main sidebar position you prefer. Once positioned click to open the widget’s display settings. You should enter a maximum number of events to be featured (between 1 and 15). You may also select various font size and color attributes to customize the widget’s appearance.
- Once you have completed the widget’s display settings click “Save”. Please note that the widget will only display those events that have been manually selected and will not auto fill events. So, once all selected featured events have expired, if no other events have been selected, the widget will automatically be suppressed from view.
Questions or suggestions? Contact: networksupport@artsopolis.com