Google Analytics 4 or GA4 is the next generation of Google Analytics. It was launched back in October 2020 but you may be receiving notices from Google letting you know that Universal Analytics (UA) will be going away July 1, 2023.
We have taken the necessary steps to add the new GA4 property to 75% of our network websites but there are about 15 sites where we do not have admin permissions or access to your Google Analytics stats. In this case, you will need to set it up your GA4 property and send us the javascript snippet or you can grant us Admin access (add artsopolis1@gmail.com to your User Management) and we can set you up.
In this article, we will discuss how to upgrade to new GA4 account. Continue reading for step-by-step instructions with screenshots.
How to Upgrade to GA4 Property From Existing Universal Analytics Property
If you already have a Universal Analytics Property and want to upgrade to Google Analytics 4 (GA4), here is what you need to do. Follow the instructions below to create your GA4 property. The instructions are the same regardless of whether your website pages have a Google Analytics tag (gtag.js or analytics.js) or a Google Tag Manager container. To use the GA4 Setup Assistant, you need to have Editor or Admin permissions for the account.
Note: If you already have a Universal Analytics tag (analytics.js) firing on your site, you should leave it in place! You can run GA4 alongside Universal Analytics, and you should keep any former Universal Analytics properties active to preserve historical data. GA4 will only record data moving forward from the point in time when you set it up.
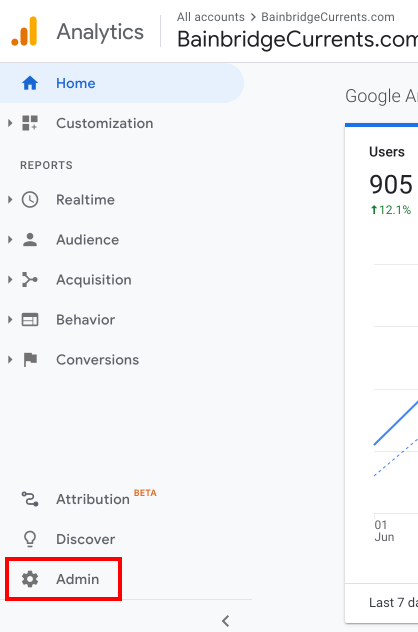
Step 1: Log into Google Analytics (https://analytics.google.com/analytics/web/) and navigate to the Admin link (lower left) of your reporting view.
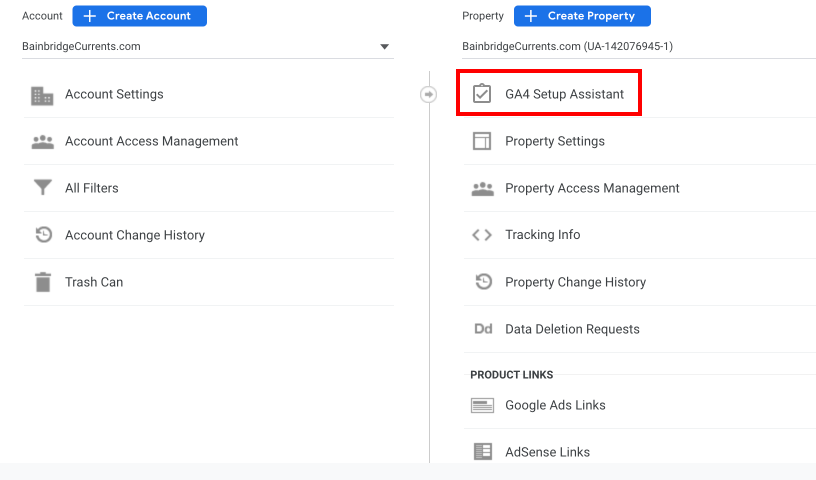
Step 2: This will land you on the admin console of the Universal Analytics Property where you can click on “GA4 Setup Assistant” under “Property” column.
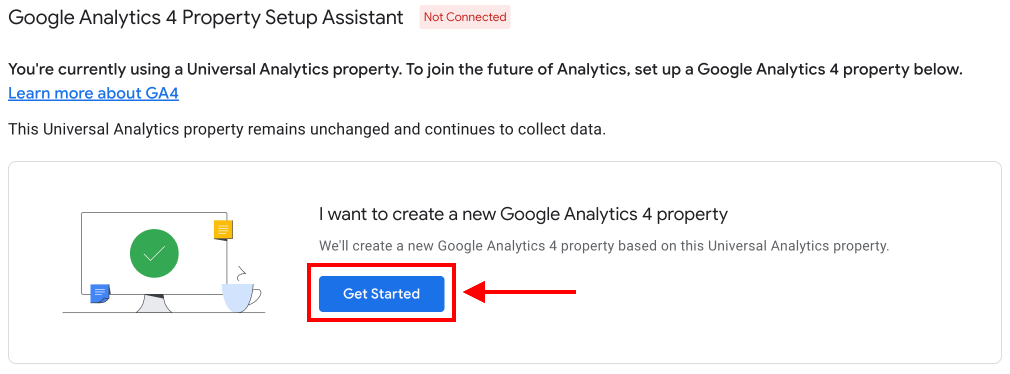
Step 3: This will take you to the “Google Analytics 4 Property Setup Assistant” screen. Click on “Get Started“ blue button.
Step 4: Clicking on the “Get Started” button will open a pop up on your screen. Click on “Create Property” blue button.
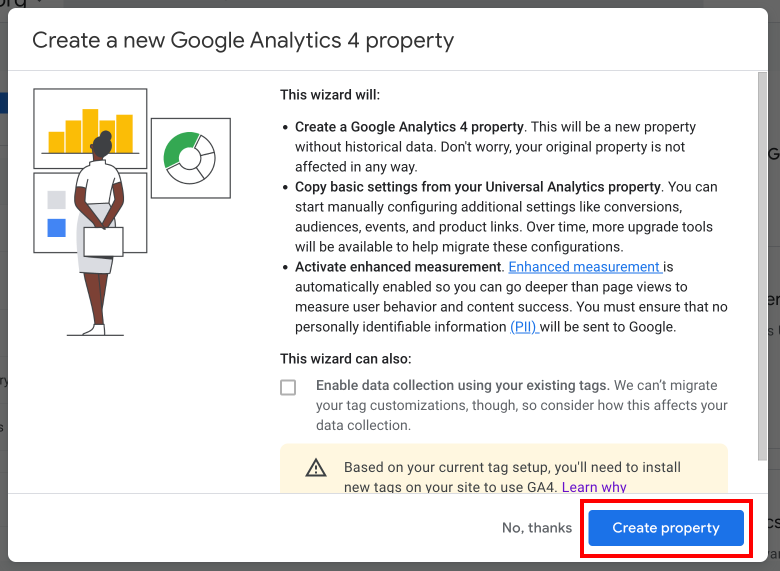
The Google Analytics wizard will now automatically create your new GA4 property.
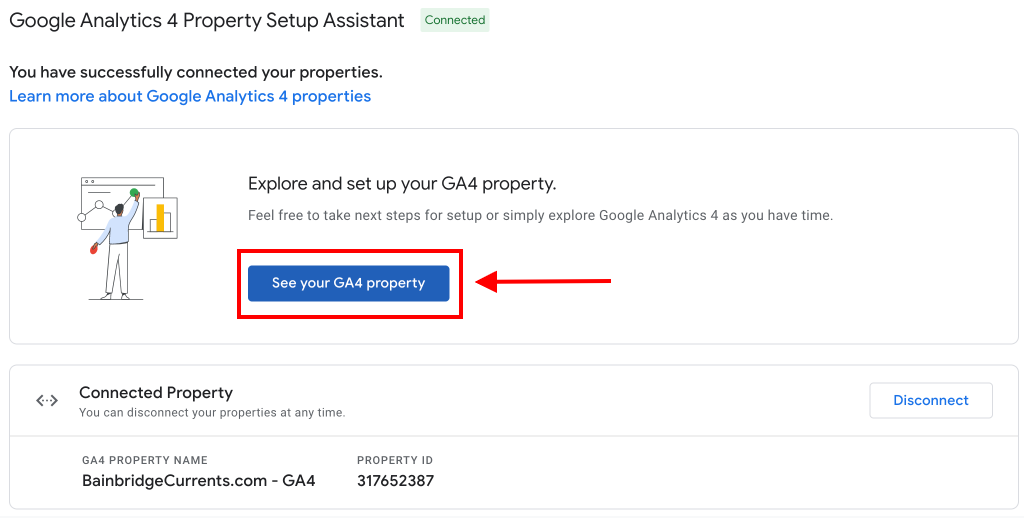
Step 5: Click on the “See your GA4 property” button.
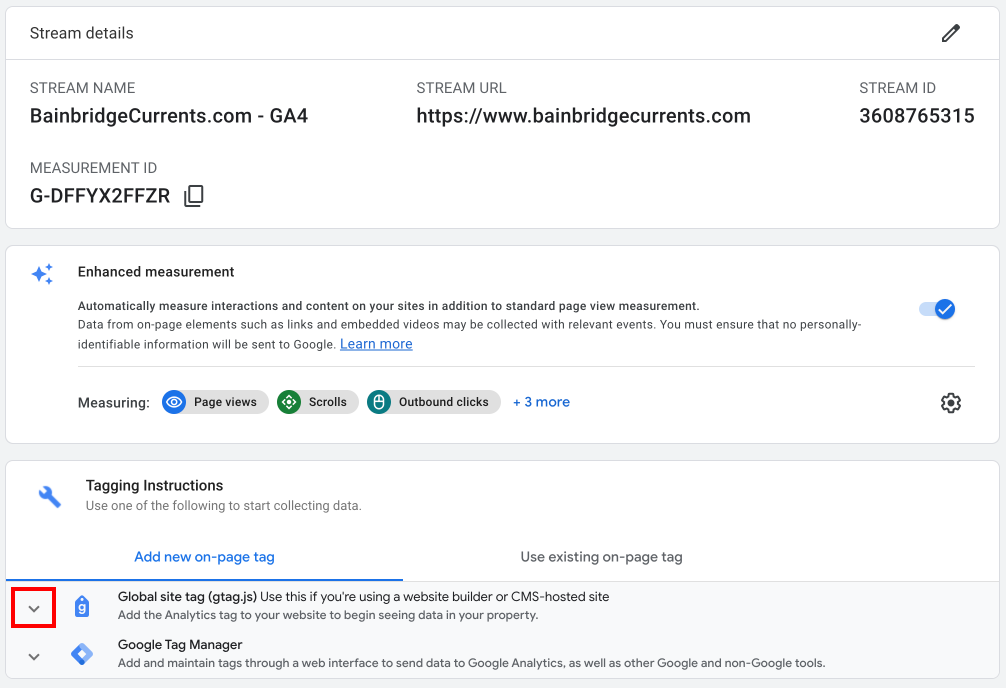
Step 6: This will take you to the “Setup Assistant” screen. Click the arrow (>) to the right of “Tag Installation” to go to the “Data Streams” screen.
Step 7: Once you are on “Data Streams” screen, click the arrow (>) to the right of your new GA4 property which will take you to “Web Stream Details.”

NOTE: If you plan to install Google Analytics 4 with Google Tag Manager, copy the Measurement ID and click here for further instructions.
Step 8: Click the down arrow next to the “Global site tag (gtag.js)” to reveal the snippet code.
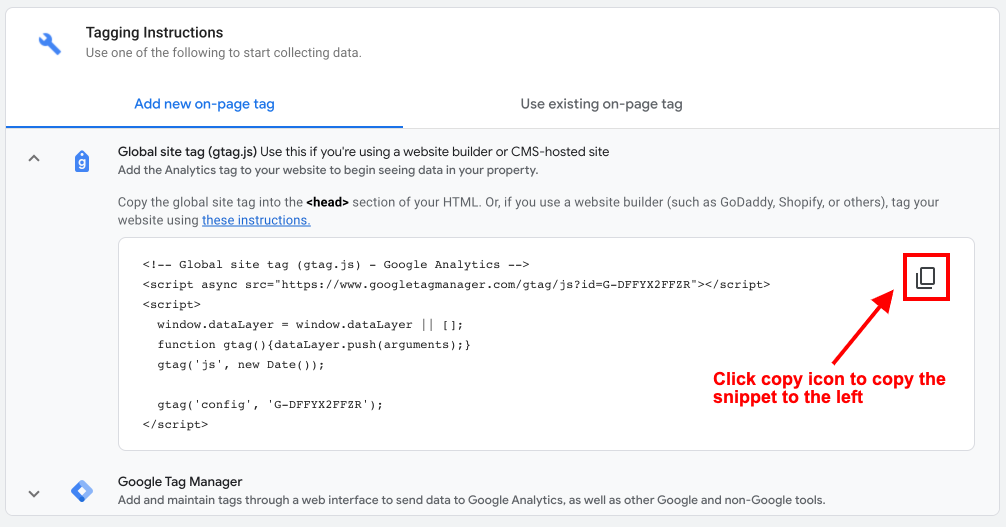
Step 9: Lastly, click on the Copy icon to copy the javascript snippet and send it to us so we can add it to your site.
Questions or suggestions? Contact: networksupport@artsopolis.com