Slider Revolution can do a LOT, but we can still summarize it for you simply.
Everything covered in this ‘Rapid Fire Overview’ section can also be learned by watching the tutorial video below:
Creating and Customizing Your First Slider
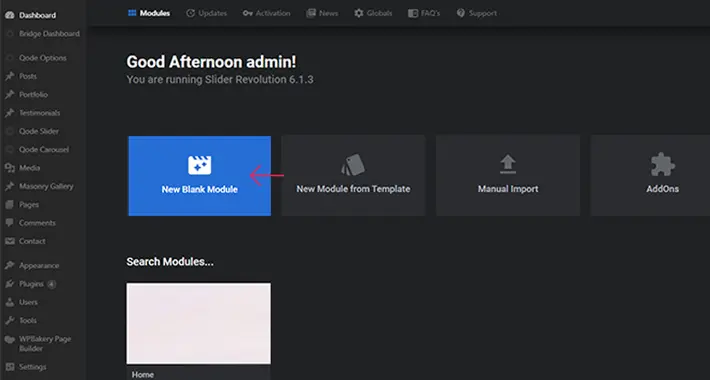
Log into the backend admin dashboard. Navigate to left toolbar and click on Slider Revolution tab.

Next, click on the New Blank Module
Naming Your Slider
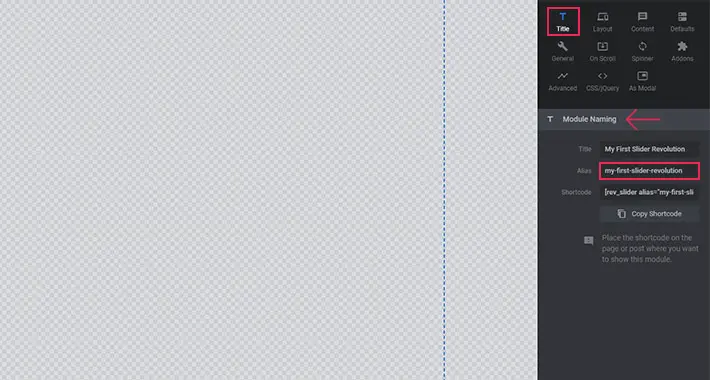
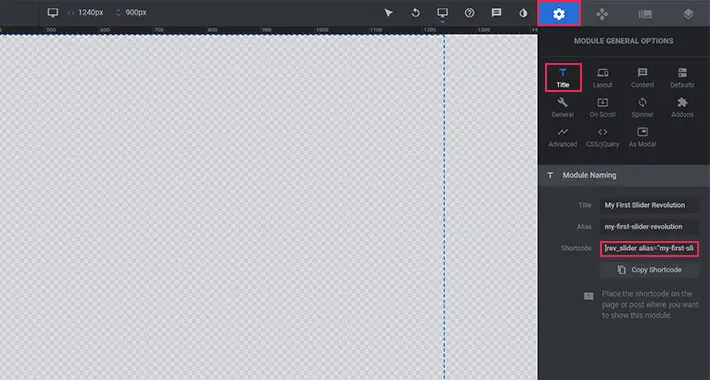
Now that you’re in the workframe, the first thing you should do is give your slider a name. Look for the Module Naming section on the right (under the Title tab). We’ll name our first slider ‘My First Slider Revolution’ – that’s what you need to enter in the Title field. The field below it is reserved for the ‘Slider Alias’. The name of the slider should also go here, only in lowercase and with dashes between the words instead of spaces. You will later use this Slider Alias to add your slider to a page on your website.
Choosing the Right Type of Slider
The next thing you need to do is choose the type of slider you want to create. Take a look at the image below.
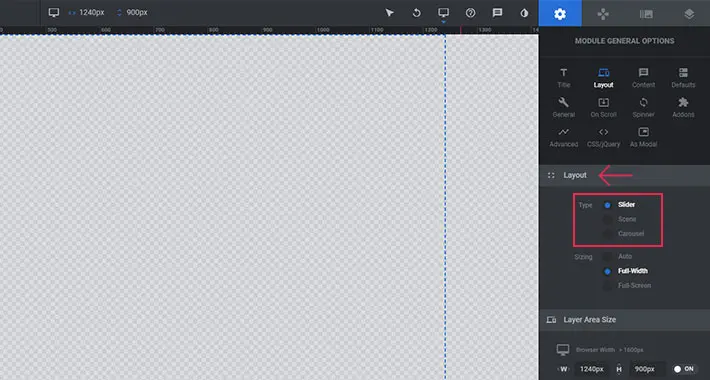
There are three types under the Layout tab – Slider, Scene and Carousel.
Slider – you should select this type if you have more than one slide.
Scene – you should choose this type when you have only one slide. If you select the Scene, navigation bullets and arrows will automatically be hidden.
Carousel – choose this type if you want to display multiple slides at the same time. Slides will be rotated radially and with a 3D effect (using distance and depth of field).
You will most likely work with the first and second type of slider.
Setting a Slider Sizing
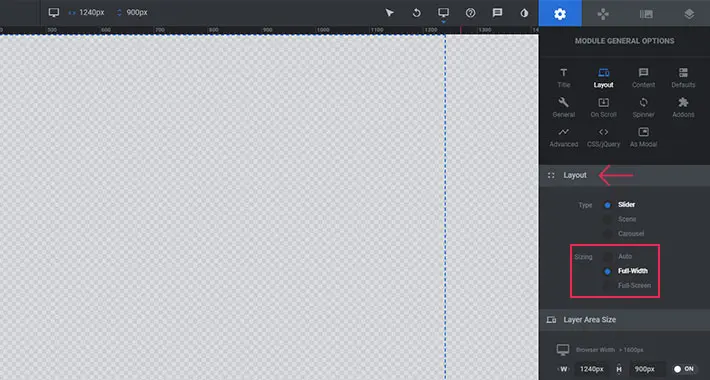
The second option under the Layout tab lets you choose a default size for each individual slider. First, you need to decide what you’re going to use your slider for. If you plan on creating a small slider, or if you want to animate some specific part of your page, you’ll probably want to choose the “Auto” option. On the other hand, if you want to create a large slider (usually displayed at the top of the page), you should choose either “Full Width” or “Full Screen”, depending on your specific needs.
Here’s a quick breakdown of the three available options:
- Auto – the slider will inherit the width of its container. This is the perfect option if you want to animate some smaller part of a page.
- Full Width – the slider will always take up the full width of the screen. The height of the slider will automatically adapt, depending on the screen it is viewed on.
- Full Screen – the slider will always fill the entire screen, regardless of the size of the screen it is viewed on.
Now that you are all set, don’t forget to click “Save”.
A Few More Useful Settings
You can now head back to the Slider Options panel of your slider on the right. Here, you will see a number of neatly arranged icons containing some more useful options. There are too many settings here to cover them all, so we’ll only go through the most convenient ones.

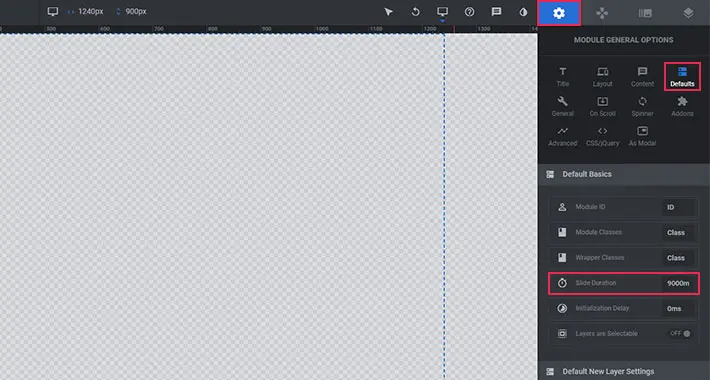
Under Module General Options > Defaults, you will see that the default slide duration is set to 9000ms. That means that every single slide in your slider will last 9 seconds before switching to the next slide. I personally think that’s too much, and that the slide duration should not be over 4000ms. Otherwise, your users will most likely only see your first slide.
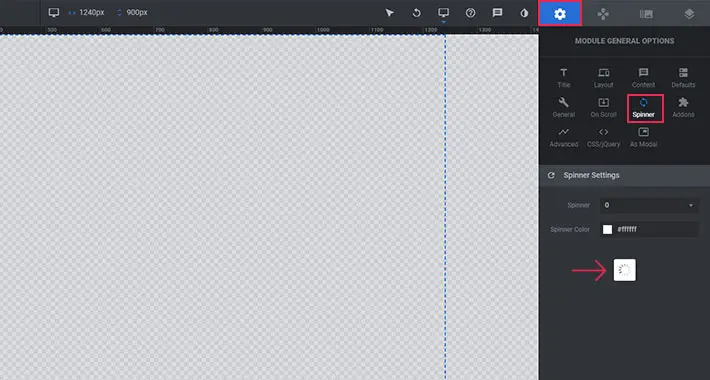
Under Module General Options > Defaults > Spinner, you can change the default spinner (or you can turn it off completely). The spinner will be displayed while your slider loads.
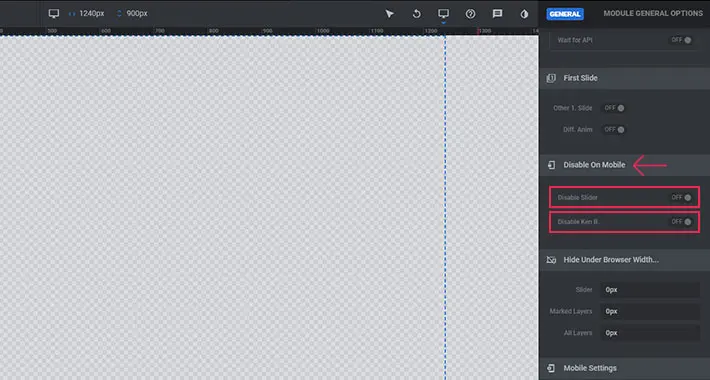
Under Module General Options > General > Disable On Mobile, you can prevent your slider from displaying on mobile devices. You can also disable the KenBurn effect from displaying on mobile devices, (and thus greatly improve the performance of your page).
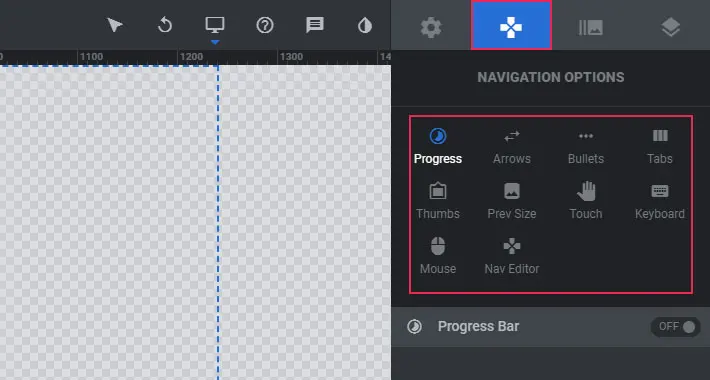
If you plan on having more than one slide, you can set your navigation in the Navigation Options. Here, you can customize settings for arrows, bullets (mostly used for mobile devices), etc.
Adding Slides and Working with Layers
Once you’ve defined and saved all your slider settings, it’s time to start creating your individual slides. Let’s head over to the Slide Options panel.

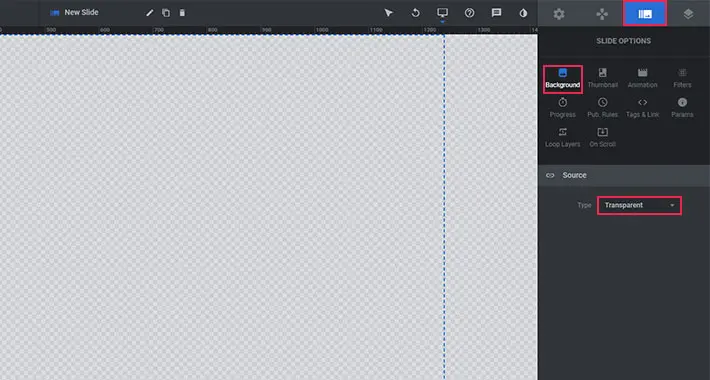
Adding a Background Image
If you don’t want your background to stay transparent, you can easily add a background image. In the options panel next to the frame there are many different tabs. One of them is titled Background, and it is selected by default. The Transparent option is also chosen by default.
To add a background image, all you need to do is select Image from the dropdown, and then click the Media Library button. Now you can either upload a new image or choose one from your Media Library. Just make sure to choose an image that corresponds to the size of your slider. I’ve created a Fullscreen Slider, so the size of my image will be (at least) 1920×1100 pixels in order to fill the entire space of a desktop screen.

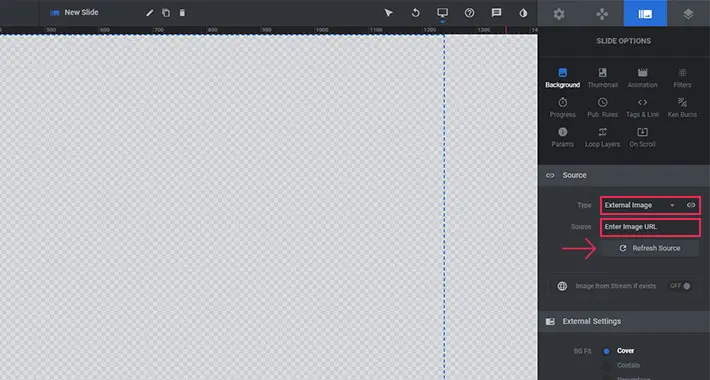
You can also add an image from an external source by choosing External Image from the dropdown. You should enter the image URL and click the Refresh Source button.
Once you choose an image, it will appear within your work frame.
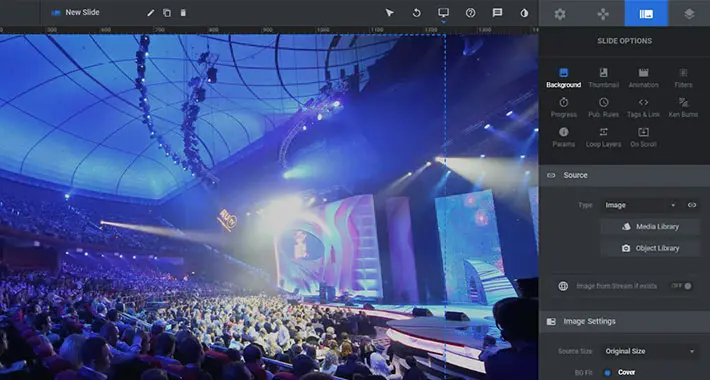
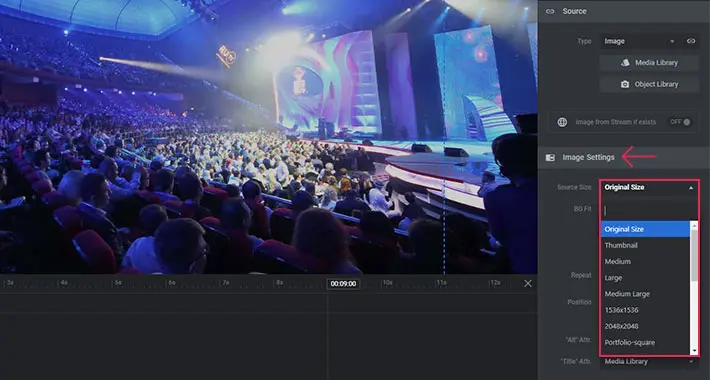
Below the Source section, there are Image Settings. The first thing that should be set is Source Size. There are different sizes to choose from – our recommendation is to leave the original image size, if you want it to look good.
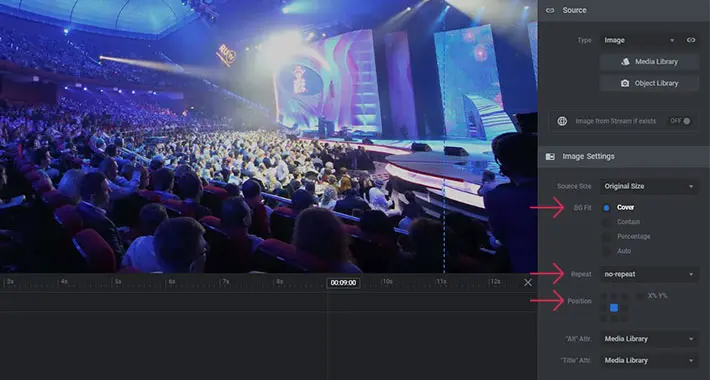
Next, under BG Fit, you can choose how you want the image to be displayed within your slide – we wanted it to be an actual background, so we chose Cover. You can also choose if you want it to repeat or not – this is useful if the image is smaller than the size of the slider, but is not recommended. The next option lets you choose the position of your image – it is centered by default.
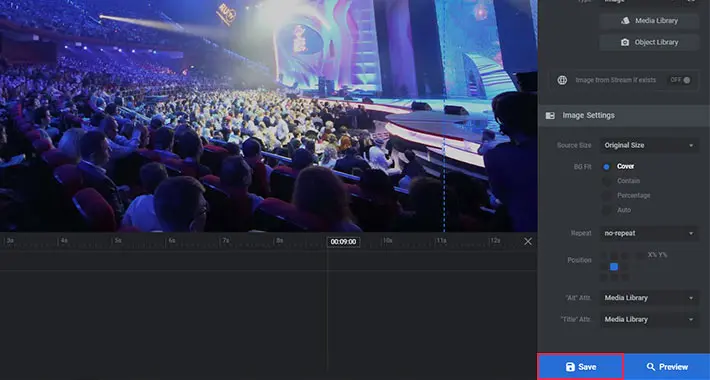
Don’t forget to press the Save button each time you make a change to your slide! Just to be absolutely clear which button we’re talking about, take a look at the picture below.
Adding Layers to Your Slides
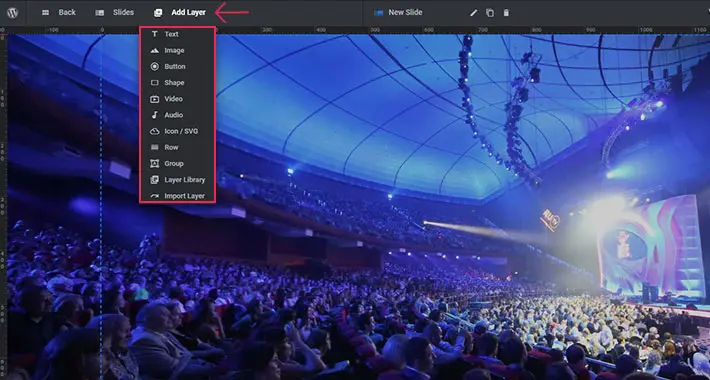
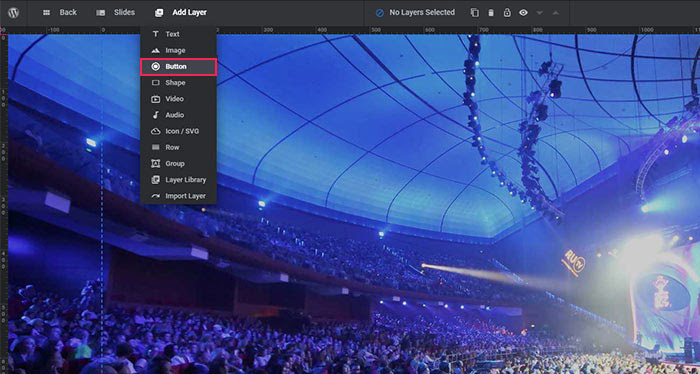
Now that we’ve gone through the basic slide options, we’re ready to start adding layers to our slide. Hop over to the work frame and hover the Add Layer button with your mouse cursor. You’ll see a dropdown with different layer options.
Now let’s add a button.
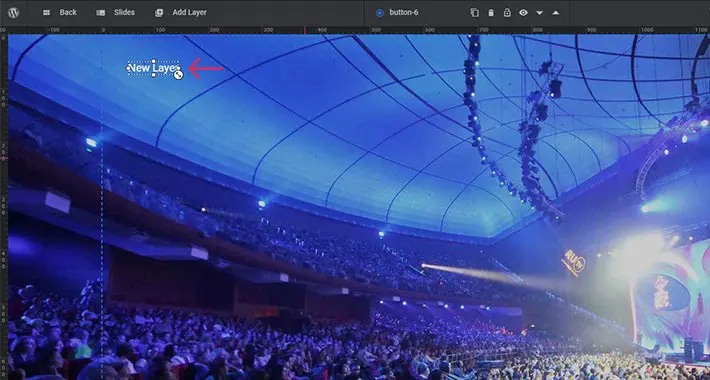
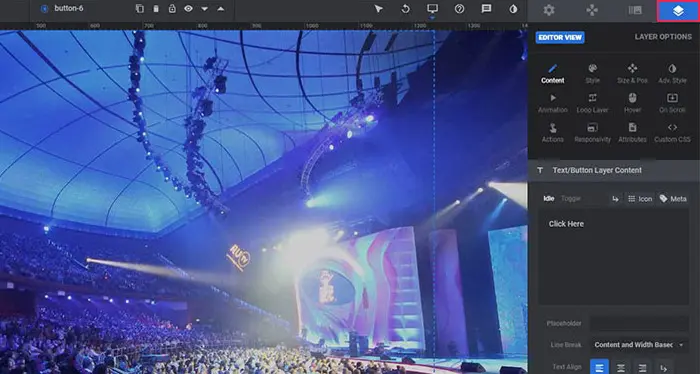
When you add the button, it will appear as text in your workframe, until you customize it.
On the right side of the screen, you will find a lot of predesigned button styles, and you can simply choose the one that fits your website style.
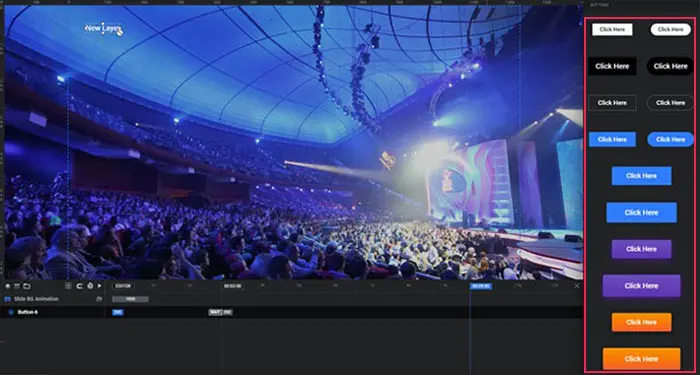
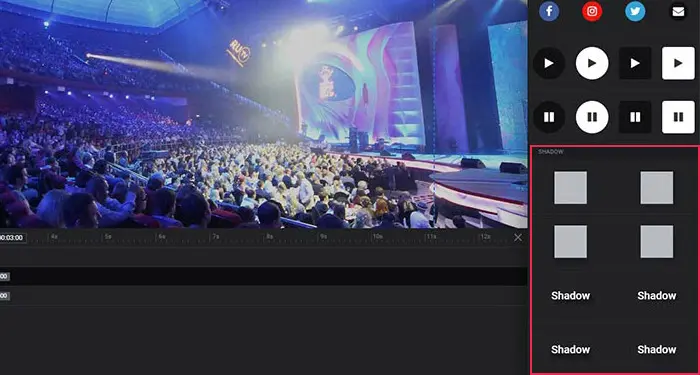
Beside these common button styles, you can also go with something a bit different, like play buttons for example.
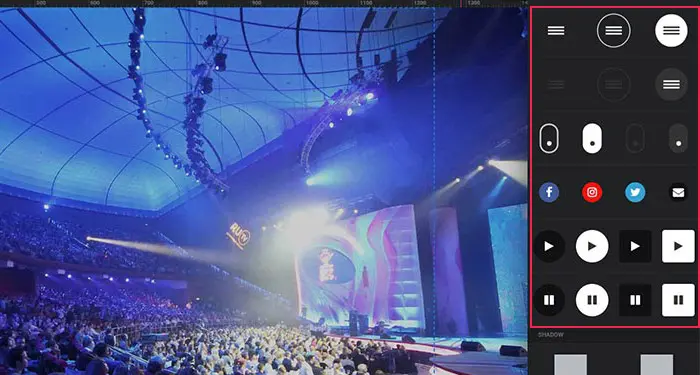
Furthermore, you can add a shadow effect to your button.
Once you have defined the basic button style, you can go and change its advanced settings to better fit your website’s look.
Customizing the button is the same as customizing any other layer from the Layer Options. Everything you need is over there, from changing the button’s initial look, to change how it’ll display on hover, and adding animations and easing to it.
And that’s all there is to it. Once you’re done with setting up your button layer, you can now add your slider to a page.
Displaying Your Slider on a Page
Now it’s time to decide where you want to display your slider. To add a slider to a page, you first need to copy the slider shortcode from Module General Options > Title. In our case, the shortcode is [rev_slider alias=”my-first-slider-revolution”].
Next, head on over to the backend of your page and paste the shortcode wherever you would like to display the slider. Update the page afterwards, so you can immediately see a live preview of your slider. Once you’ve added the shortcode to a page, every change you make to your slider will be visible on that page. Just don’t forget to hit the Save button every time you make a change!
For more information and instructions on Slider Revolution, please visit their Manual at https://www.sliderrevolution.com/manual/creating-your-own-modules-from-the-ground-up/
Questions or suggestions? Contact: networksupport@artsopolis.com